Attach a spring into one of the trampoline mat’s v-rings or spring loops. Attach the second spring to the end of your hook. Pull the hook back and forth until the two springs are in contact with each other, and then pull them apart. You should now have two spring-loaded hooks, one on each side. Repeat this process with the third and fourth springs.
Table of Contents
Does it matter which way coil springs go?
You want the spring’s coil direction to match the threads so that the parts can be used together. The wind and coil direction of a torsion spring must always cause both ends to move towards each other. As a result of this movement, the coil’s diameter should be tightened.
If you have a spring that is too small, you may need to increase the diameter of the coil to make it fit. You can do this by adding a small amount of solder to the end of each coil. This will make the coils fit together better. If you don’t want to add solder, then you can use a larger diameter spring.
Which way should coil springs face?
Generally, it will be the “flatest” end of the spring that faces strut mount bearing and the most “open” end facing the shock absorber’s spring seat. It is important that the ends of the coil spring are in relation to each other. If they are not, the springs will not be able to move in the correct direction.
The coil springs should be mounted in a manner that allows them to be easily removed from the strut mounts. This is done by removing the two bolts that hold them in place. The bolts are located on the left and right side of each strut mounting plate. Remove the bolts with a small flathead screwdriver or similar tool. Be careful not to damage the mounting plates as you remove them.
Once the bolt is removed, you can slide the coils out of their mounting holes. You will need to use a pair of needle nose pliers to do this, as they can be difficult to remove. It is also important that you do not over-tighten these bolts. Tightening them too much will result in excessive spring movement, which can cause damage to the suspension components.
Is it safe to use a trampoline with one broken spring?
Yes, even if just one spring is stretched, broken or rusting, we recommend replacing it immediately. When a spring is not working, it will cause additional stress to its peers or the mat itself, which can cause it to fail.
Is a trampoline safe with a missing spring?
If you think that springs have been over sprung or that springs are missing from a trampoline, you should stop using it until the springs are back to normal. Bounce off is a term used to describe a situation in which the bounce is off the ground.
This can be caused by a number of factors, such as the weight of the person, the angle at which they are standing, or the type of bounce. It is important to remember that the only way to know for sure if your bounce has been off or not is to test it out yourself.
You can test this out by standing on the floor with your feet together and holding your arms straight out in front of you with the palms of your hands facing each other. Try to bounce as hard as you can, and if it bounces off, then you know that it has bounced off.
Does a trampoline need to be perfectly level?
Changes to the installation process are needed, but it is possible to put a trampoline on a hill. The ground must be leveled if it isn’t. If you want to use a rope, make sure that the rope is long enough to support the weight of the person on top of it.
A rope that is too short will not be able to hold a person in place. The rope should be at least three feet in length. It should also have a knot at the end that will allow it to be tied securely to a tree or other object.
Can you make a spring tighter?
If you make the wire diameter bigger, you will make the spring stronger, and if you make it smaller, you will make it weaker. This is because, by making the wire diameter larger, you are also making the spring’s coils tighter which in turn makes it more likely that the coil will be able to withstand the load.
This is why it is so important to make sure that your spring has a diameter that is at least 1/4″ larger than the diameter of your wire. If you do not make this adjustment, then your coils will not be strong enough to support the weight of the battery and it will eventually fail.
What happens if I hook my coil up backwards?
The power on both sides of the coil will be shown by a voltmeter. You will fry your engine if you have the wires reversed at the coil. If you don’t have an ECU, then you’ll need to find a way to get the voltage from the battery to the coils.
The easiest way is to use a multimeter to measure the resistance between the positive and negative terminals of your battery. This will give you an idea of how much current is flowing through the batteries. You can then use this information to calculate the amount of current that will flow through your coils when you turn the ignition switch on.
Which side of the leaf spring goes forward?
Customarily, the end of the spring with the band wrapped around it is placed forward of the axle, closest to the front of the trailer, but it really makes no difference. The shorter distance would be forward on leaf springs that are asymmetrical. If you have a leaf spring that is symmetrical in length and width, you will need to adjust the length of your spring to compensate for the asymmetry.
You can do this by measuring the distance between the two ends of each spring, and using that as a guide to determine how much to lengthen or shorten. For example, if you are using a 4-inch spring and your axle is 3-1/2 inches long, then you would need a spring length adjustment of 3/4 inch.
What tools do I need to put trampoline together?
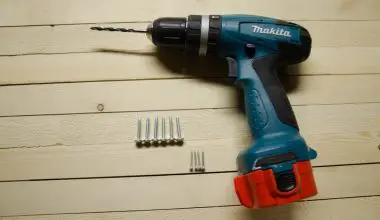
You need to gather your tools. You will need a power drill or Phillips head screwdriver. The rubber mallet and spring puller are included in the packaging. You should also have gloves handy for when it is time to attach the screws. Drill a hole in the bottom of the box.
If you are using a drill press, you will want to make sure that the hole is large enough for the screw to go through. This will ensure that you don’t have to use too much force to get it in. It is also a good idea to have a bit of extra material in case you need to re-drill the same hole later on.
Make sure you have enough material to cover the entire hole so that it doesn’t get too hot when you drill the next hole. Be careful not to over-tighten the bit as this can cause the drill to not work properly. Once you’ve drilled your hole, use your screw driver to push it all the way in until you hear a click.
The screw should now be in place and ready to be attached.