When sewing the binding to the quilt, leave yourself plenty of space to work between the tails and leave yourself a generous tail at each end. I leave about 10 square feet of space. The quilt should be laid flat on the work surface. Fold the folded tails back together and secure with a stitch or two.
You should now have a long tail that is about 1/2″ longer than the width of your binding. This tail will be used to tie the edges together. Fold the tail into thirds and tie it in a knot at the end. The knot should be about 3/4″ in diameter. Repeat this process for the second and third tails until you have tied all three tails together in one knot.
Now you are ready to start sewing. Sewing the Quilt to a Blanket (optional) and you’re done! If you don’t want to use a blanket, you can also use this technique to make a quilted blanket. Just make sure that the blanket is large enough to accommodate your quilts.
Table of Contents
How wide do you cut binding for a quilt?
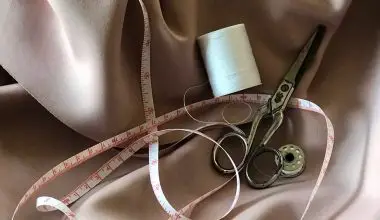
The width of the binding should be decided by fabric cutting. Depending on how wide you want your finished binding to be, the standard choice is 2 1/4′′ or 2 1/2′′. Both of them are attached in the same way. The finished look of the binding as well as the ease of sewing will be affected by the thickness or loft of your quilt. Sewing The binding should be sewn to the fabric as close as possible.
If you are sewing to a fabric that has a lot of stretch, you may want to use a machine that is designed to sew to stretchy fabrics such as cotton or polyester. This will allow you to adjust the amount of tension you need to apply to make sure that your binding is not too tight or too loose. You can also use an elastic band to help you sew.
It is a good idea to have a ruler handy so you can see how much tension is needed to achieve the desired look and feel. For example, if you were sewing a 2″ wide binding, the tension needed would be about 3/8″ of an inch, which is about the size of a pencil eraser.
How do you connect pieces of binding?
Place them on a flat surface and pin them securely. Cut out the letters. Use a sharp knife to cut out each letter, starting at the top and working your way down to the bottom. Be sure to leave a little bit of extra space between the letter and the edge of the paper, so that you don’t end up with a letter that’s too long or too short.
You can also use a ruler to make sure you’re cutting in the right direction. Once you have all of your letters cut, you can fold them in half lengthwise and lay them flat on your work surface. Repeat this process for the remaining letters, making sure that they’re all folded in exactly the same way.
Which one is the simplest way to finish your quilt?
The easiest way to finish your quilt is this. Instead of applying a binding, you simply sew around the edges of the quilt sandwich as if it were a giant pillowcase, leaving an opening on one side that’s big enough to turn inside out. If you’re going to use a zipper, make sure it’s long enough so that you can pull it all the way through the opening.
If you don’t have a long zipper (like I did), you’ll have to cut a piece of fabric to fit inside the zipper and sew it in place. I used a 1/4″ seam allowance, but you may want to go a little smaller or bigger depending on the size of your zipper. You can also use the same method to sew the sides together, if you’d like.
Do you sew binding Front Back quilt first?
You will be able to do the final stitching by machine if you start on the back and wrap to the front.
Do I quilt before I bind?
You need to quilt your quilt before you bind it. Attaching the front and back with batting is what this means. The first thing to do is to make sure you have the right batting. The batting you choose will determine the look of your finished project.
For example, if you use a batting that is too light, it won’t look as good as one that’s a little heavier. You’ll also want to consider the type of batting used for your project, as well as the weight of the fabric you’re using. A heavier batting will make it more difficult to work with, while a lighter one will be easier to handle.
We recommend using batting made of 100% cotton or polyester. Cotton batting can be found at most craft stores. Polyester batting is more expensive, but it’s more durable, and it will last longer than cotton. It’s also a great choice for projects that require a lot of sewing, such as blankets, pillows, or blankets that you’ll be wearing for a long period of time.
How do you bind around curves?
If you want to bind curves, you need to cut your binding strips on the bias as this has more stretch than the straight grain. Trying to bind corners with straight grain strips will result in undesirable results as they won’t have the bend and give that the bias has.
To cut bias strips, position your ruler at a 45 degree angle to the edge of the fabric and cut the strips as shown in the picture below. Once you have your strips cut, fold them in half lengthwise and place them face down on your work surface. You’ll want to make sure that they are as flat as possible so that you don’t end up with a bunch of uneven strips.
Repeat this process for the other side of your fabric. Now you’re ready to start binding your curves. Begin by folding your bias strip over and pinning it in place. This will ensure that it will lay flat when you sew it together. Next, take a piece of fabric that is about the same size as the strip you just cut and lay it on top of it.
How do you bind a quilt with double fold binding?
It will wrap itself around the quilt in the way it should be laid. The middle crease will cover the edges of your quilt as the other half of the binding covers them.
How do you sew continuous binding?
Cut along the fold line. The triangle should be flipped so that the side at the top is visible. To make a parallelogram, sew the two pieces together on the right side. The bias should be marked parallel to the size of your triangle. Sew the triangles together.
Turn your triangles inside out and sew them together with a 1/4-inch seam allowance. If you’re using a sewing machine, you may want to use a zigzag stitch instead of a straight stitch to keep the seams from fraying.
You can also use your hands to help you sew, but be careful not to over-stitch or you’ll have to re-sew the whole thing. When you’ve sewn all the way around, trim the excess fabric to the desired length.
I like to leave about 1-1/2 inches of extra fabric on each side of my triangle to give it a more finished look.