Head over to Photo Edit and find Tools. In the tools section, click Adjust and select Exposure. Bring the adjustment bar to the left to reduce the amount of noise in the image. Exposure , and then click OK to close the Adjustments dialog box. You should now be able to adjust the exposure of your image by dragging the slider on the right side of the window.
Table of Contents
Can bad lighting ruin a photo?
Bad lighting can ruin a picture, so it’s important that the lighting is good. If you have a wonderful subject to photograph but the lighting is bad, your results will not be as good as if you had good lighting.
Why are my iPhone photos overexposed?
The sun is the biggest cause of overexposed or under exposed photos. When shooting in bright or harsh light, your camera will struggle to capture the image. Change your camera angle so that you aren’t shooting directly in front of your subject, and you will be able to get a much more accurate exposure.
If you’re using a tripod, make sure that the camera is set to manual exposure mode. This will allow you to set the shutter speed and aperture at the same time. If you don’t know how to do this, take a look at our tutorial on setting up a camera tripod.
How do you fix white balance?
To counter this is very simple: just pay a visit to the overall white balance slider and drag that thing in the opposite direction from the color you want to neutralize. For this image, you would drag the white balance from the blue side to the yellow side until the scene no longer has any color at all.
Now, if you were to go back to your original image and try to make it look like this, it would look completely different. You would see that the sky is now blue, the trees are now green, and the grass is green. This is because you have neutralized all the colors in your image.
In other words, they have lost some of their vibrancy. And that is exactly what we want. We want our images to look as natural as possible, so that we don’t have to worry about how we are going to achieve that.
How do you fix blown out white in Lightroom?
The easiest way to fix a blown out highlight is with the whites and highlights sliders. The exposure of the bright part of your photo will be targeted by the two sliders together. The highlights represent the best parts of your image. The second way is to use the white balance slider. This slider controls the amount of white that is used in your photos.
In this case, we want to make sure that our photo has a neutral tone. To do this, click on the “White Balance” slider and select “Neutral” from the drop-down menu. Once you have selected this option, press “OK” to save your changes. You can then go back to the basic panel and adjust the other settings as you see fit.
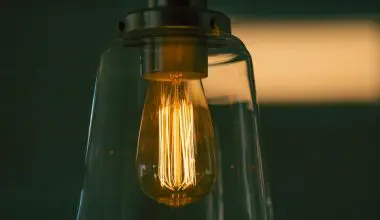
What is the best ISO for indoor shooting?
If you are shooting from your hand, you need to raise your ISO to 400 or 800 to get the same amount of light. If you want to be able to shoot in low light, then you need to use a higher ISO. The higher the ISO, the more noise you will see in your photos. This is why it is important to keep your shutter speed as low as possible when shooting indoors.
Why do my photos looked washed out?
It is normal for most pictures taken at a large distance to look washed out. The dust/haze/smog/pollution/heat waves/etc., in the air reflect and refract light enough to reduce the amount of light that reaches the camera’s sensor. In the case of a DSLR, the lens is designed to focus on the center of the frame, and the sensor is focused at infinity.
This means that when you take a picture, you’re actually focusing on a point in space, not on an object in front of you. If you look at the image on your computer screen, it looks like you are looking at an image that has been stretched to fill the entire screen. That’s not how it works in real life.
It’s also important to note that the distance between your camera and your subject doesn’t matter, as long as the subject is in focus.
How does the ISO setting affect your photos?
ISO increases or decreases the brightness of a photograph, but also affects both grain / noise levels and dynamic range. ISO setting will have the least amount of noise and the highest dynamic range, giving you the most control over how your photos look.
However, at higher ISO settings, you’ll have more noise, grain, and noise in the shadows and highlights, as well as more grain in darker areas of the image. It takes a lot of ISO to get a good shot, especially if you’re shooting in low light. The higher the ISO, the less light you have to work with.
For example, if your camera has a base ISO of 100 and you shoot at ISO 400, it will take you about 2.5 stops of light to achieve the same level of detail in your image as you would with a lower ISO.
This is why it’s important to keep your ISO as low as possible, so you can get the best possible results from your shots.
Can you shoot ISO 100 at night?
Of course at night you won’t have enough light to shoot handheld at ISO 100, so using this value is only possible if you have a tripod. If you have a tripod at home, now is the best time to increase your ISO setting. It will be easier to focus on the subject you are trying to capture if you increase the ISO.
If you’re using a digital SLR camera, you can use the same ISO value for both manual focus and auto focus. If you use a point-and-shoot like the Canon EOS 5D Mark III or the Nikon D800E, then you will need to set the aperture to f/2.8 or higher to get the most out of the sensor.
The higher the f-number, the more sensitive the camera is to light, and the faster it will be able to lock on to your subject. For example, a camera with a sensor with an ISO range of 200 to 6400 will have an aperture of 1.4 to 2.0, depending on how much light it is exposed to.
This means that you need a shutter speed of at least 1/60th of a second to keep the shutter open for as long as possible.