The nail-down install method requires the first and last rows of flooring to be nailed through the face of the board. Only the boards that are nailed through the tongue are left. To prevent splitting face-nailed boards, drill 1/32-inch diameter holes for the nails, 1/2 to 1-inch from the edge of each board. If you are installing a double-hung ceiling, you will need to nail the second and third rows to the ceiling joists.
Table of Contents
How do I make the first row of hardwood floors straight?
Tie one end of a chalk line to one of the nails. The chalk line should run parallel to the wall. Paint the chalk lines on the wall with a paintbrush. If you are using acrylic paint, you will need to apply a thin layer of paint to the walls before you paint them. This will help prevent the paint from drying on your walls and will make it easier to remove later.
Where do you start when laying tongue and groove flooring?
The floor has room to expand and contract if you leave a gap of about 12 inch. Pull the second board as close to the first as you can, because the shorter ends need to touch. Once all four pieces have been placed, turn the board over and repeat the same process.
When you are done, you should have a board that looks like this: 9. Now that you have your board, it’s time to put it to use.
How should hardwood floors be laid in room?
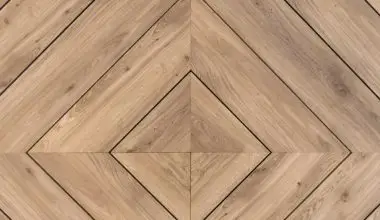
Aligning the planks parallel to the longest wall is the most common way to lay flooring. The preferred direction to lay wood floors is this one because it allows the wood to spread out over the entire length of the floor.
However, if you have a lot of wood, you may find that you need to align the boards in a different direction. This can be done by using a planer, which is a tool that allows you to cut and shape wood into a specific shape.
You can also use a jointer, but it is more expensive and not as easy to use.
Does it matter which way you lay wood flooring?
It is better to lay wood floors in between floor joists than across them. This will make the floors sound and will help prevent the plank from collapsing.
Do you nail into the tongue or groove?
The groove of the plank should face the wall and the tongue should face outward. The tongue is not so accessible that it can be pulled out by the nail. The nail should be about 1/4 inch in diameter. It should not be too long or too short, and it should have a smooth, even surface.
The nail is to be driven into the wood with a mallet or hammer. If you are using a hammer, make sure that the hammer head does not touch the edge of your nail, as this can cause the tip to break off. You can also use a nail file to smooth out any rough edges that may be present on your nails.
Is it OK to change direction of wood flooring between rooms?
It’s mostly a matter of personal preference when it comes to the direction a hardwood floor is laid. The hardwood flooring should be placed parallel to the floor. Changing the direction of the floor in every room can cause problems. If you are unsure of how to lay a floor, consult a professional.
How do you nail the last few rows of hardwood flooring?
The last rows are cut by hand. If the hammer head hits the flooring, use a nail set to protect it. Face-nailing the remaining rows is when you can no longer blind-nail by hand. The nails should be about 1/2 inch long.
You can cut them off with a pair of scissors or a hacksaw, but be careful not to cut the nail heads. If you do, you will have to re-drill the holes in the wood. Be sure to leave a little bit of wood on the end of each nail so that it can be easily removed when you are done.
How much space should be between hardwood floors and walls?
You need to leave between 10 and 15mm around your room. You’re sure to get the right size of space between the suit and the walls if you use this method. Once you’ve got your suit sized, it’s time to put it on. The easiest way to do this is to take a pair of scissors and cut a hole in the back of the helmet.
You’ll need this hole to fit your helmet, so make sure you don’t cut it too close to your face or you’ll end up with a helmet that’s too big for you. Once the hole is in place, use a small piece of masking tape to secure it to the inside of your head.
Make sure the tape is not too tight, as you want to be able to move the mask around without it falling off. It’s also a good idea to have a bit of extra tape on hand so that you can easily remove it if you have to remove your mask for any reason. Now that everything is put together, we’re ready to test it out.