Priming your rocks before you start painting is important for two reasons: the surface will be smoother and less porous, but still porous enough to absorb paint permanently (as opposed to a smooth surface that can be easily sanded away), and the paint will last longer.
If you are painting a large area, you may want to start with a small area and work your way up to larger areas. This will allow you to get a feel for how much paint you need to use and how long it will take to dry.
Table of Contents
What kind of paint will stick to rocks?
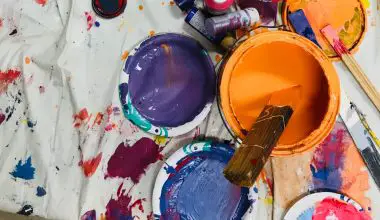
A good paint to use on rocks is acrylic paint. You can see my recommendation for my favorite brand of acrylics. A variety of colors can be achieved with ARTEZA Acrylic Paint. Paints are great for rocks. I like to add a little bit of water to my rocks to keep them from drying out too quickly.
You can use a spray bottle to do this, or you can add water directly to the rocks using a garden hose. If you don’t have access to a hose, I recommend adding a few drops of dish detergent to your rocks before adding water. This will help keep the water from soaking into the rock and making it hard to work with.
I also recommend using some kind of scrubbing brush to scrub off any dirt that may have gotten into your rock. It’s important to clean off the dirt as soon as possible so that it doesn’t get stuck in the cracks and crevices of your stone. Once you’ve scrubbed off all of the dust and dirt, it’s time to start working on the stone itself.
The first step is to make sure that you have the right tools for the job.
How do you clean rocks to paint them?
The stones need to be washed with soap and water. If you want to get the dirt off, use an old toothbrush or scrub brush. Allow the air to dry completely with a towel or paper towel. Remove any rough parts or buff the rocks.
What can I spray on rocks to make them shiny?
Water-based silicone or polycrylic spray silicone coating penetrate rocks to produce a shiny, wet look. Silicone spray finish may oxidize over time. A more permanent shine can be achieved with a polycrylic finish. Silicone is a non-porous material, which means that it does not absorb moisture from the air or water.
Is gesso a primer?
One type of painting surface primer that’s been around for centuries and is still used today is gesso. It’s purpose is to prevent paint from getting into the weave of the canvas. It’s also used to protect the surface of a painting from scratches and dings.
Gessos can be applied to a wide variety of surfaces, including paper, canvas, wood, metal, glass, and plastic. They can also be mixed with other types of paints, such as acrylics and pastels, to create a paint-like finish.
How do you smooth out a stone?
Begin with a coarse grain of sandpaper, and moisten the paper with water. Begin sanding until most of the rough edges begin to become smooth and rounded or until you see the desired shape of the rock. Some stones and gems are softer than others. If you sand too hard, you will not be able to smooth out the edges of your stone.
Sanding too soft will result in a stone that is too brittle and will crack when you try to pick it up. The best way to sand your stones is to use a fine-grit sand paper, which is available at your local hardware store. You can also use an abrasive stone, such as a diamond polishing stone or an emery board, but be careful not to apply too much pressure, or you may damage the stone’s surface.
Once you have sanded the stones to a smooth, rounded shape, it is time to polish them. To polish a gemstone, first remove all the dirt and grime from the surface, then apply a small amount of polish to the gem. This will help to remove any imperfections that may have been left behind by the previous cleaning process.
Does acrylic paint wash off rocks?
One downside of acrylics is that they tend to be difficult to wash out of clothes, so be careful when using them. You’ll need a paint brush to apply the paint to the rocks, and you’ll also need to use it to remove the excess paint from the rock. You can find a variety of brushes at your local craft store or online, but I recommend using a small paintbrush with a fine tip.
The larger the brush, the easier it is to control the amount of paint you’re applying. If you don’t have a brush handy, you can also use your fingernail or toenail clippers to scrape paint off the surface of a rock, which is a great way to get rid of any paint that’s stuck to your fingers.