If you can’t see the photo itself, apply the Photo Transfer Medium to the top of the photo. The front of the glass block is where it should be placed. The scrapper or credit card can be used to smooth out any air bubbles. Remove it from the block and place it on a dry surface.
Remove the Glass Block with the Scraper or Credit Card Using a sharp knife, carefully cut away the excess plastic. You can also use a pair of pliers to hold the plastic in place while you cut it away. Once you have removed all the extra plastic, you should be left with a smooth, flat surface on which to place your photo.
If you don’t have a scraper or card, just use your fingers to smooth out the surface and then use the back of your hand to gently press down on it to flatten it out. The photo should now look like the one below.
Table of Contents
How do you put a picture on a glass block?
If you can’t see the photo itself, apply the Photo Transfer Medium to the top of the photo. The front of the glass block is where it should be placed. The scrapper or credit card can be used to smooth out any air bubbles. Remove it from the block and place it on a dry surface.
Remove the Glass Block with the Scraper or Credit Card Using a sharp knife, carefully cut away the excess plastic. You can also use a pair of pliers to hold the plastic in place while you cut it away. Once you have removed all the extra plastic, you should be left with a smooth, flat surface on which to place your photo.
If you don’t have a scraper or card, just use your fingers to smooth out the surface and then use the back of your hand to gently press down on it to flatten it out. The photo should now look like the one below.
What to use to draw on candles?
Markers or colored pencils can be used to draw on the tissue paper. Because tissue paper is so thin, cover your work space with regular printing paper so that you don’t have to worry about tearing the paper. Using a sharpie or marker, draw a line that is about 1/8-inch (3 mm) from the edge of the piece of tissue. This line will be your guide for where you want to cut.
You can also use a ruler to help you draw the line, but I find that it’s easier to just draw it with my fingers and then cut with scissors. If you’re using a marker or pencil, make sure to mark the center of your cut line with a Sharpie. Once you have your line drawn, cut out the design.
I like to start with the middle of my design and work my way out to the edges. For example, if I have a design that looks like this, I would start at the top left corner and go all the way around the entire piece. Once you’ve cut your piece out, you can fold it in half and use it as a template for your next cutout.
What do you fill glass blocks with?
One of the best things about a glass block is being able to put lights and decorations inside. You can put little lights inside the blocks, or even fill them with fake flowers. You can also use these blocks to decorate the inside of your house.
Can you paint glass block windows?
As long as the paints you use are rated for work with glass, you can paint the blocks any way you want. Depending on your preference, either spray on paint or hand-paint designs.
Can you print on glass?
It is possible to print on glass, but you need a glass printer to do so. Flat items such as glass coasters, panels, and cylindrical objects can be printed. You need a primer or precoat to get the glass ready for printing. You can do this by spraying a thin coat of primer on the inside of the container.
This will make it easier to remove the primer later. Once you have primed your glass container, place it in a warm, dry place and allow it to dry for at least 24 hours before you start printing. If you don’t have access to a hot water heater, use a fan to circulate the air around your container to keep it from drying out too quickly.
Once you are happy with the look of your print, let it sit for a day or two to allow the print to fully dry. When you’re ready to use it, simply peel off the paper backing and place the object in the correct orientation.
What can you use to write on wax?
Permanent ink markers can be used to write on wax paper, but only if the ink is completely dry. Dry erase markers will become more difficult to erase if they mark on wax paper. If you want to use a permanent marker, you will need to make sure that the marker is completely dry before you use it.
You can do this by placing it in a cup of hot water for a few minutes, then wiping it off with a paper towel. If you are using a marker that is not waterproof, it may not be able to be wiped off completely.
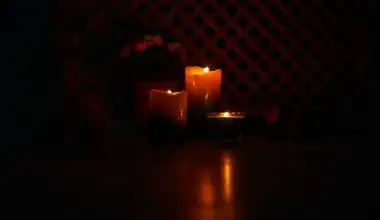
Can you use embossing powder in candles?
This candle project is possible because of the raised texture on paper that you can get with the tool and powder. It’s important to get clear embossing powder because it works with every color of ink and always comes in handy. Stamp a design onto the candle with a stamp tool.
Then, use the powder to create a raised pattern on the paper. You can also use this technique to stamp designs onto paper, but it’s a bit more time-consuming. If you’re looking for a way to make your own stamp, check out this tutorial.