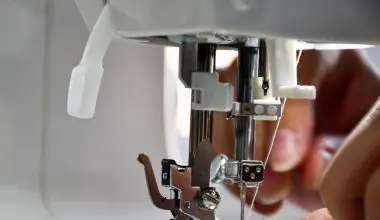
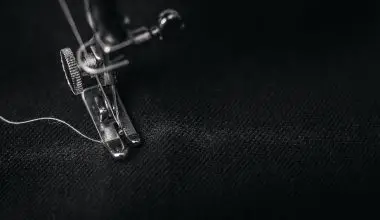
A time saving method of making patchwork quilt blocks is strip piecing.
The size of the block is determined by the width of the fabric Strips of fabric are cut across the width of the block The strips are sewn together into “strip sets”, which are then cut to the correct size to make segments of quilting fabric.
Strip piecing can be used to make a wide variety of blocks, including quilts, blankets, pillows, and more.
Table of Contents
What size strips for a strip quilt?
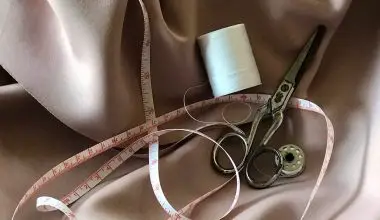
Quilt patterns using 2.5 inch precut strips are popular. These strips are usually 2 12 wide x the width of the fabric, and sometimes called Rolie strips. They can be used to make quilts, blankets, pillows, and other quilt-like items. Precut fabrics are available in a wide variety of colors and patterns.
Some of the most popular colors are: black, blue, brown, green, red, white, yellow, orange, pink, purple, teal, turquoise and white. You can also find pre-cut fabrics at fabric stores and on the Internet.
How much fabric do I need for a strip quilt?
For seam allowances, add7/8 inch to the finished size for a cut size of 9-7/8 inches. Even though one need be a partial width, it’s only about a quarter of an inch. Cut out the squares using the same method as Step 2, except that you will need to cut out 4 squares for each strip.
You will also need a ruler to measure the width of the strips, and a pencil to mark the center of each square. If you do not have one of these items, you can use a piece of cardboard or a sheet of paper to make a template for the square, then cut it out with a sharp knife or scissors.
This will help you to keep track of how many squares you have cut, as well as the number of strips needed to complete the pattern. If you are using a pattern from a book or website, make sure to check the dimensions of your squares before you cut them out.
What size quilt will a 20 strip Jelly Roll make?
First of all, you want to make sure that you have enough fabric to cover the entire area you are going to be quilting in. If you don’t, then you will end up with a bunch of strips that are too big and won’t be able to fit into the space you need.
Second, it is important to remember that the width of a strip is not the same as its length.
What is the difference between foundation piecing and paper piecing?
Both techniques are used to make patchwork and quilt projects. English paper piecing is done by hand and can be recycled, but foundation piecing is done by machine, and you cannot reuse the paper. How to Make a Foundation Piecing Quilt or Patchwork Project: 1. First, you will need to cut out a piece of paper that will be the size of the quilt you are making.
You can use any size paper you want, just make sure it is large enough to cover the entire width and length of your project. I will try to answer as many questions as I can, but if I don’t know the answer to your question, I may not be able to help you at all, so please be patient with me while I figure it out. 2.
Next, take your paper and fold it in half lengthwise. This will make a rectangle that is about the same size as your fabric.
What kind of paper do you use for paper piecing?
It is easy to find at your local quilt shop or fabric store. If you don’t have a quilting machine, you may be able to make your own Newsprint by cutting a piece of newspaper and folding it in half. You can then cut the folded paper into strips and sew them together with a sewing machine.
How do you make a foundation piece?
To foundation-piece, you stitch fabric pieces to a foundation paper with the marked side of the paper facing up and the fabric pieces layered underneath. mirror images of each other will be the result of the pieced units. Cut out the piecing pieces. You’ll need to cut out a total of four pieces of fabric, one for each of your four corners.
For this tutorial, I’ll be using two pieces for the corners, but you can use any number of pieces as long as they’re all the same size. If you’re using a different fabric for your corners than the one I’m using, make sure you cut the pieces out exactly as shown in the picture below. Cut out your pieces and place them on your work surface. I like to use a piece of scrap fabric that’s about 1/2 inch wide and 1 inch long.
This will allow me to fold the piece in half lengthwise and then cut it into four equal pieces that are about 3/4 inch in width and 2 inches in length. Once you’ve cut all four of these pieces, fold them over and pin them in place. Make sure that the pins are facing down and that you have a good amount of space between them so that they don’t move around as you sew.
What kind of fabric is used for rag quilts?
Woven cotton and flannel are the best for rag quilts. I like to choose woven cotton prints for the top layer and flannel colors for the middle and back layers. Flannel is very soft and easy to break. It’s also a great fabric for quilting.
For the bottom layer of your quilt, choose a fabric that is thick enough to hold up to the weight of the fabric you are using. For example, if you’re using a 100% cotton fabric, you’ll want to make sure it’s at least 1/2″ thick.
If you have a heavier weight fabric like linen, it may be a good idea to go up a size or two in order to get the right amount of weight for your fabric. You can also use a thicker fabric than you think you need, as long as it doesn’t weigh you down too much.
This will give you a more solid foundation to work with, and it will also make it easier for you to sew in the corners.
How do you start a jelly roll rug?
If you want to make a roundjelly roll rug, start with a very tight circle instead of sewing two sides together in a strip. Sew the Round Jelly Roll Rugs to the Base of the Table Top Now that you’ve made your rounds, it’s time to sew them onto the base of your table top. To do this, you’ll need to cut two pieces of fabric that are about the same size as your squares.
Then, fold the fabric in half lengthwise and sew the two halves together. You can also use a zigzag stitch, but I find that a straight stitch works just as well. Once you have both pieces sewn together, pin the edges together to create a seam that runs along the length of one side of each fabric piece.
This seam will be your seam allowance, which is how much fabric you will have to add to your square to make it the right size for the table you’re going to use it on. If you don’t have enough fabric to cover the entire table, just add a little more fabric on top of this seam, and you should be good to go.
How many strips is 2 yards?
You should get about 14 strips per yard. A different number of strips may be required for each folded fabric block. Cut the fabric strips into strips of equal length. Fold the strips in half lengthwise and then in the opposite direction. This will create a “V” shape on the back of your fabric.
You can use a ruler to measure the length of the folded strips, or you can measure from the fold to the edge of a piece of fabric and use that as a guide. If you don’t know how to do this, ask a friend or family member to help you with this step. The fold should be about 1/2″ to 3/4″ in length, depending on how long you want your strips to be.
I like to make my strips about 3″ long, but you may want to cut them shorter if you have a lot of extra fabric to work with. It’s up to you to decide how many strips you need for your project. Using a serger, sew the ends of each folded strip together. Make sure that the serged edge is facing up, and that you are sewing from right to left.