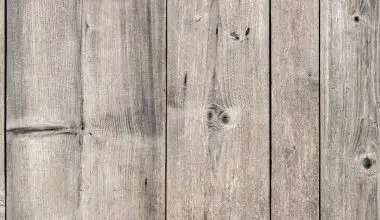
Suitable surfaces include wood, papier mache, terra cotta, tin, cardboard, and glass. I recommend testing a small area before completing your entire project to make sure that you can decouple the plastic from the surface you’re working on. . The first step is to remove any adhesive that may have been applied to your surface. This can be done with a sharp knife or a utility knife.
If you don’t have one of these tools, you may be able to scrape the adhesive off with your fingernail. Be careful not to cut yourself on the way down, as you will need to re-apply the glue. Once you have removed any excess glue, it’s time to separate the two pieces of plastic. You can do this by using a pair of tweezers to gently pry the pieces apart.
Make sure to keep your fingers away from any sharp edges or sharp corners as this may cause you to scratch your skin. It’s also a good idea to use a piece of tape to hold your pieces together while you are doing this, so you won’t accidentally rip the tape off of your workpiece during the process.
Table of Contents
What kind of Modge podge do you use on wood?
If you want the image to be opaque without the wood grain showing through, you have to use mod podge photo transfer medium. If you want the image to be translucent with the wood grain showing through, use regular, non-mod podge photo transfer medium. You can use any type of photo paper you like, but I like to use a heavy-duty cardstock.
I also recommend using a light-colored paper to make it easier to see through the paper. The photo should be about 1/4 inch thick. It should look like this when you’re done: You can also use the same photo for the front of your card, if you’d like. Just make sure that you don’t apply it too thickly, or you’ll have a hard time getting it to stick.
Does Mod Podge make wood waterproof?
Wood, glass, metal, and ceramic are some of the surfaces that Mod Podge can be used on. It creates a finish that is durable. Podge is used to seal and finish surfaces. Podge is commonly used in the automotive industry to seal and finish surfaces.
How many layers of Mod Podge should I use?
Depending on the affect you are trying to achieve, two or more coats can be used. If you want a smooth surface with no ridges, apply at least 5 coats and let it dry completely before applying the next coat. Apply a second coat of the same color.
This time, use a brush to apply the color to the entire surface. You can also use your fingers to blend the two colors together, but be careful not to get too much of one color into the other.
How do you use Mod Podge without brush strokes?
When applying the Mod Podge, use a soft, wide brush and as few brush strokes as possible, as it begins to set quickly. It is best to brush it on with one or two strokes. Use coats that are very thin. It is best to use a different color for each layer. Apply a second coat of the mod podge.
This time, apply it in a thin, even layer over the first coat. Be careful not to apply too much at once, or you’ll end up with a messy mess. You can also apply a third coat if you’d like, but it’s not necessary.
What is the fastest way to cure Mod Podge?
Set a timer for 5 minutes (I use my phone), place the craft on a flat non-metal surface, and go over the surface of the craft slowly with a hairdryer set to medium speed and high heat. I leave the dryer nozzle on, just make sure I am slowly moving it.
Once you have reached the desired temperature, turn the heat down to low and let it sit for a few minutes. This will allow the wax to solidify. Once it has solidified, remove it from the oven and allow it to cool to room temperature before using.
How do you apply Modge podge smoothly?
Podge over a design, apply one layer of the Mod Podge with side-to-side brush strokes. Allow that coat to dry for 20 minutes or so before applying another even layer of Mod Podge in up-and-down strokes. I have found that the process results in a smooth finished product.
Does Modge podge yellow over time?
Dries crystal clear is non-yellowing no-run and quick drying, 12.5 oz., and is specifically formulated to seal craft projects. This is a great product to use on your craft projects. It is non-yellowing, quick drying, and easy to apply. I have used this product on a variety of projects and it has worked great on all of them.
The only downside is that it does not dry as quickly as some of the other products on the market. However, if you are looking for a product that will dry quickly, this is the product for you.
Can I use Mod Podge to seal acrylic paint on wood?
You can use Mod Podge as both a protective sealer and as a glue. It will work on almost any porous surface. Podge is a great protective finish for painted wood, fabric, and many other surfaces.