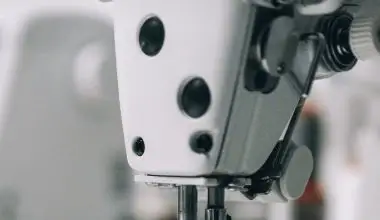
To sew along the inside of this fold, use cotton thread in a matching color and a running stitch. Once you have stitched the tape to the quilt’s front, wrap it over the edges and use a slipstitch to tack it in place. Fold the fabric in half lengthwise and pin the two halves together at the top and bottom.
Pin the sides together and sew them together with a 1/4-inch seam allowance. Use a zigzag stitch to sew the seams together. Repeat this process on the other side. You should now have two quilts that are the same width and length, but have different widths and lengths.
If you want to change the width or length of one of them, you can do so by cutting a piece of fabric that is slightly larger or smaller than the one you are going to use for the new size.
Table of Contents
How do you fix a small tear in a quilt?
To fix small holes, I cut a small piece of lightweight fusible interfacing and inserted it into the quilt under the rip with the fusible side facing the wrong side of the quilt top. If you align the edges of the rip, you can bring it back together.
How do you fix frayed edges on fabric?
You can glue your edges with fabric glue, seam sealant, or super glue. Purchase them at a local craft store or online. Attach small amounts of glue to the edge of the fabric. Use a cotton swab or toothpick to spread glue over the surface of your fabric, and let it dry for a few minutes. Next, cut out a rectangle of fabric that is the same size as your seam allowance.
Fold the rectangle in half lengthwise, so that the top and bottom edges are facing each other. Then, fold the bottom edge over and pin it in place. Repeat this process on the other side, pinching the edges together to seal the seam. You can also use a sewing machine to sew the seams together, but I find that it’s easier to do this by hand.
How do you keep raw edges from fraying?
It works just as well on the fabric edges as it does on the raw edges. Match the colour to your fabric or choose a clear nail polish. Apply a thin line along the very edge of the fabric and let it dry for a few minutes. Repeat with the other side. If you have a lot of fabric, you may need to do this several times.
If you don’t have enough fabric to cover the entire edge, use a piece of scrap fabric that is about the same size as the edge you are trying to protect. Cut it in half lengthwise, and then cut the two halves into strips about 1/2 inch wide. You should now have two strips that are about 3/4 inch long. Use a sharp knife or scissors to cut each strip into three pieces.
This will make it easier to work with. Place the three strips on a flat surface and press the edges together to make a smooth, even surface. The strips should be about 2/3 of an inch thick, but not so thick that they stick to each other when you press them together. Now you can use your fingers to smooth out any rough edges that may be present.
How do you seal fabric edges without sewing?
Using nail polish to contain fraying fabric edges is an easy, effective and quite inexpensive technique. When used with lightweight fabrics, it works best. A thin layer of nail polish is applied along the edge of the fabric. Nail polish can also be used to cover the edges of fabric that has been frayed. This technique works well with fabrics that are very thin.
For example, if you’re working on a shirt, you can use a small amount of polish on the edge of the shirt to make it appear as if it’s been worn a few times. If you want to use more polish, apply it to the entire shirt and let it dry completely before applying the next layer.
Are handmade quilts valuable?
The average price for a throw-size quilt is about $100, and it is the most popular size. If you’re making a blanket for a friend or family member, you may be able to get away with a lower price. However, if you are making it for yourself, it can be a lot more expensive. I’ve seen quilts that cost as much as $2,500, which is quite a bit more than I would spend on a regular blanket.
The reason for this is that you have to pay for the time it takes to sew the blanket together, as well as the cost of fabric, needles, thread, etc. It’s also important to note that the fabric you use for your blanket may not be the same fabric that is used for other items you make.
What is the best way to store old quilts?
Don’t store your quilts in air-tight containers or storage bags; cutting off the air will speed up the decomposition of the cotton as well as storing them in high temperatures. It’s a good idea to avoid folds as they can become permanent in your quilts.
A flat bed with a few inches of space between the bottom and the top is the best place to store a quilt. Quilts should be stored in a cool, dry place away from direct sunlight. Quilts can be kept in the garage, basement, attic, or attic of your home.